Road Bike Fitting
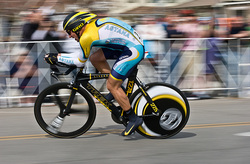
If you are an avid road biker than it is critically important to properly set up your bike to avoid injury and maximize performance. Below I will outline exactly how to set up your road bike to ensure you are doing just that. At the end I will also give a few pointers training and bike modification.
Some Cool Info About Cycling
At 80 revolutions per minute a cyclist may complete:
Some Cool Info About Cycling
At 80 revolutions per minute a cyclist may complete:
- 5400 revolutions in an hour ride
- 30,000 revolutions in a 100-mile course
- 81,000 revolutions in a 1-week span.
_______________________________________________________________________________________
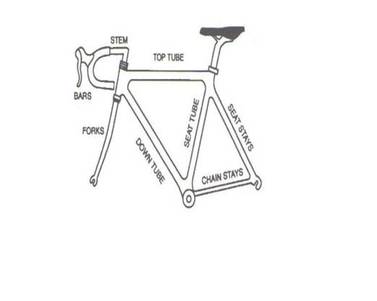
Parts of a Road Bike
_______________________________________________________________________________________
_______________________________________________________________________________________
What is the Shoe-Cleat-Pedal Interface?
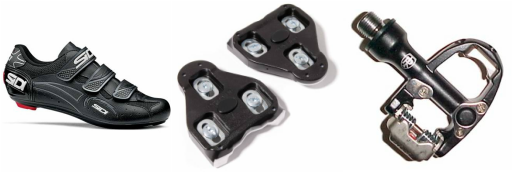
A road bike shoe is fitted with a "cleat" that clips onto the pedal of your bike locking your foot in place on the pedal.
THE SHOE THE CLEAT THE PEDAL
_______________________________________________________________________________________
Let The Fitting Begin
There are 6 Things to Consider When Fitting Your Bike:
- The Shoe-Cleat-Pedal Interface.
- Saddle Height.
- Saddle Forward/Backward Position.
- Saddle Tilt.
- Stem and Handlebar Height.
- Stem Length or Extension.
#1 The Shoe-Cleat-Pedal Interface.
Firstly, the cleat should be attached to the shoe in a position that allows the ball of your foot to lie directly over the pedal axle. *Ahead of the ball of the foot will cause Achilles injuries and behind the ball will cause shin and knee injuries.*
#2 Saddle Height
Second, you need to ensure that your saddle (or seat) is at the proper height. There are two ways of doing this:
|
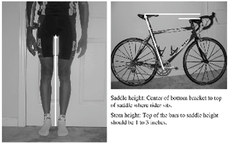
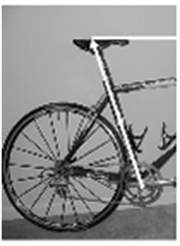
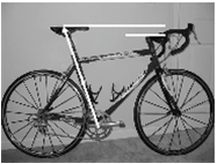
1) Take your inseam measurement in cm (shoes off) and multiple it by 0.883. This will give you the distance from the center of the bracket to the top of the saddle. (picture on the right)
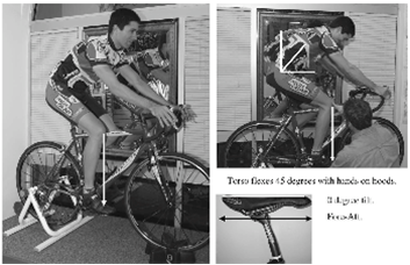
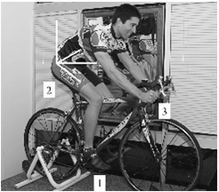
or 2) The second method is to mount your bike and begin pedalling. When the pedal is at the bottom or the 6 O'Clock position, your knee should be between 20 and 30 degrees bent. (picture aside) |
#3 The Saddle Forward/Backward Position
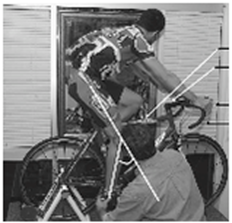
When the pedal is at the 3 O'Clock position (forward and horizontal to the ground) and you drop a plumb line from the inferior pole of your patella (knee cap), the line should fall right though the axle of the pedal. Basically the knee shoudn't be ahead or behind the middle of the pedal in the 3 O'Clock position. (see picture below)
|
#4 Saddle Tilt
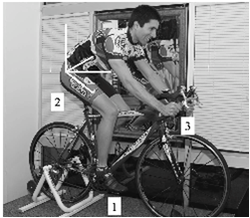
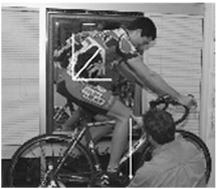
The seat should be close or level to parallel with the ground. The saddle supports about 60% of the body weight, if the saddle isn’t wide enough, numbness can occur. Some riders tilt the saddle slightly forward to decrease pressure over the area. (Men: do not sit directly on your prostate!) #5 Stem and Handlebar Height With your hands on the brake hoods and arms slightly bent: the body should be angled about 45 degrees from the top tube. (see picture aside) When the hands are in the drops the torso should drop to 30 degrees from the top tube. (see picture aside) The vertical distance between the top of the saddle and the top of the stem should be 1-3 inches. (the stem being lower) |
Why is stem height important?
The rider accounts for 65% to 80% of overall drag while riding. The lower the stem is, the more aerodynamic the rider will be.
The rider accounts for 65% to 80% of overall drag while riding. The lower the stem is, the more aerodynamic the rider will be.
#6 Stem Length or Extension
This refers to upper body position relative to lower body:
- If the stem is too high and the top tube too short, the rider will be too bunched up.
- If the stem is too low and the top tube too long the rider will be too stretched out.
- The hub of the wheel should be obscured by the cross bar of the handlebars when he/she looks down.
- Also in this position when the knee is maximally flexed, the knee and the elbow should be 1-2 inches away from eachother.
*This is why it is important to have to proper size bike for your body dimensions. Click HERE for a general sizing chart.*
So there you have it! If you follow these 6 steps to setting up your road bike you will ensure that you will be avoiding injury and giving yourself the best overall position for perforance and energy expediture.
Training Info
This is some additonal info for the more serious rider:
Rocovery Phase Training
Training yourself to pull up in the recovery phase of pedalling: The power phase is when you are pedalling downward and propelling the bike forward. The opposite leg is simlutaneously undergoing the recovery phase on the way up. If you can train yourself to pull up during this phase you can reduce the downward force being exhibited by that leg and foot, therefore, becoming a more efficient rider.
How to do it:
First you will need a trainer in which you can mount your road bike. Next you will just clip in to one pedal leaving the other unclipped. Begin cycling with one leg; this forces you to pull up during the recovery phase. Be sure to train both sides equally.
Injury Prevention
General rule of thumb: if its something in your lower body that is bothering you then ajust the saddle accordingly. If its something in your upper body then adjust handlebars.
Pain in the front of your knee: the saddle may be too low or too far forward causing the patella (knee cap) to be in front of the pedal axle. Also, excessive climbing, pushing big gears and the crank arm being too long can contribute.
Pain in the back of the knee: the saddle is too high or too far back.
Pain in the back of the neck or between the shoulder blades: your reach is elongated (stretched out). Place the yourself in a more upright position (this will also prevent low back pain)
Shin Pain: The saddle is too high.
Calf and Achilles Pain: The saddle is too low.
That concludes this section on road bike fitting and training. Hope it was helpful. If you have any additional questions feel free to stop by the office or email me.
-Dr. Paul Merlino,DC
References
•Silberman et al. Road bicycle fit. Clinical journal of sport medicine : official journal of the Canadian Academy of Sport Medicine (2005) vol. 15 (4) pp. 271-6
•Asplund et al. Genitourinary problems in bicyclists. Current sports medicine reports (2007) vol. 6 (5) pp. 333-9
•Patterson et al. Ulnar and median nerve palsy in long-distance cyclists. A prospective study. The American journal of sports medicine (2003) vol. 31 (4) pp. 585-9

